Decided to share two of my other Not Polish Related passions tonight HAIR & CRAFTING! Little tid bit about me :) I have hair long enough to sit on and I really enjoy playing with and adorning it. Here is a little project Ive been working on recently, a knock off of the ever popular Flexi-8 redone as a hair slide (a decorative piece secured with a hair stick).
Here is a tutorial -
1. First you need your supplies. Beads of choice and wire -
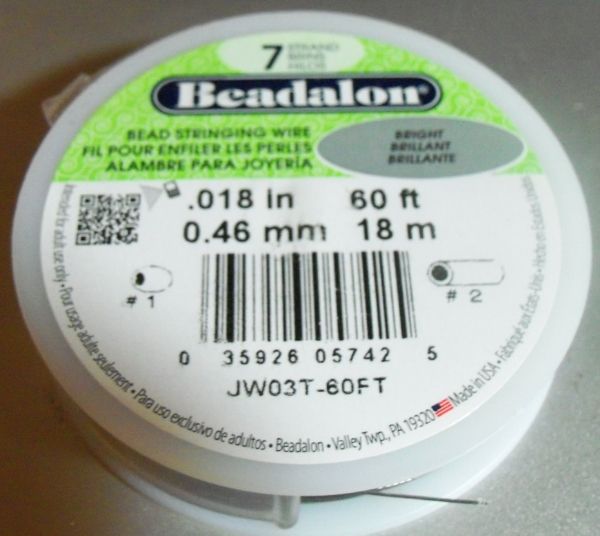
This is what I used though preferably you would be able to find something around a 20 gauge nylon coated tiger tail (a multi-strand wire) in stainless steel or aluminium.
2. Layout your beads in the desired size and pattern -
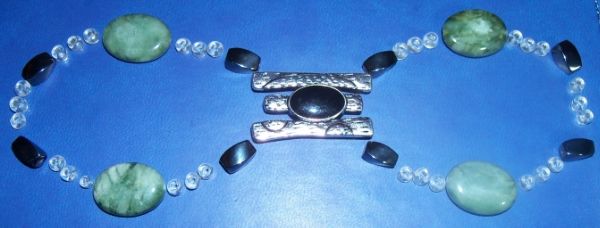
Pardon the funky alignment those black twists are magnetic and kept trying to hook up.
3. Not really a step but here is a close up of the back of my center bead -
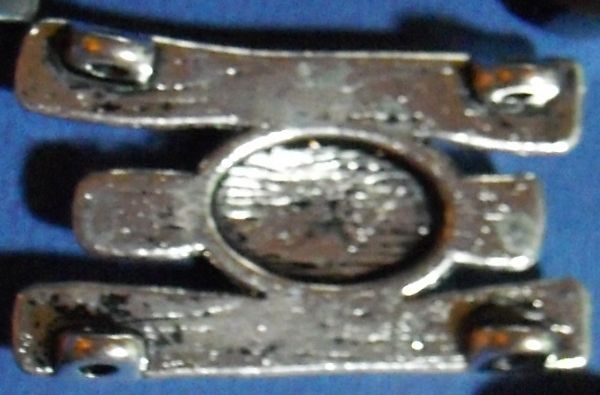
I choose a four threaded option for stability so it cant shift sideways in use.
4. Unravel the desired amount of wire (allow for doubling if you are using a thin wire as I am). Thread the free end through the first hole down into the center bead and then back up the second hole
If you are using closed crimps (no opening in one side) this is where you put them on so they sit in between the holes. At the moment I don't have any so bear with me, for security's sake I suggest three. Now thread on the first loop of beads.
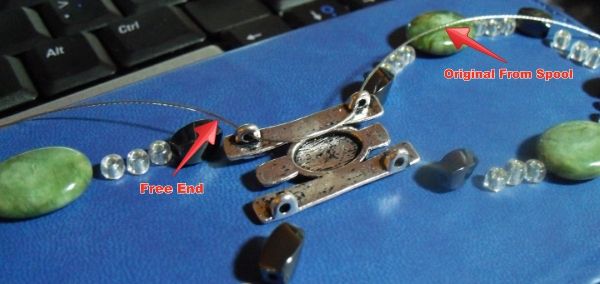
5. Here you can see one side threaded and one side layed out -
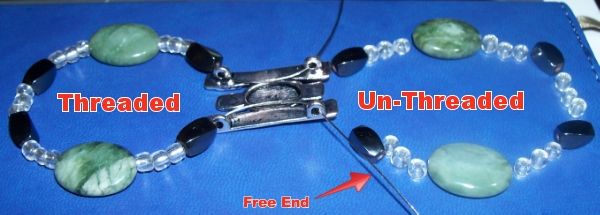
As you can see once you thread on the first loop you go up through hole three (this is where you add the remaining three crimps) and down through hole four. Thread on remaining loop of beads.
6. Now with both loops threaded you go back down through hole one and the imaginary crimps -
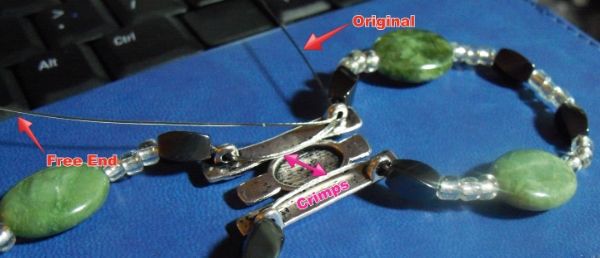
Pink arrows indicate where the crimps would be placed.
7. No picture for this one but if you are using a fine gauge wire as I am you may want to repeat the threading process for adding resistance. For .46mm wire I like three loops the best but two will do. If you leave it at one you end up with more of a floppy-8 than a flexi-8 that wont hold its shape under the torque of a stick. Once you are satisfied with the resistance ensure both the original and free ends are secure under the crimps and tighten them with tool of choice (generally pliers) and clip ends leaving approximately 1/4 inch tail past each crimp.
8. And the finished product -
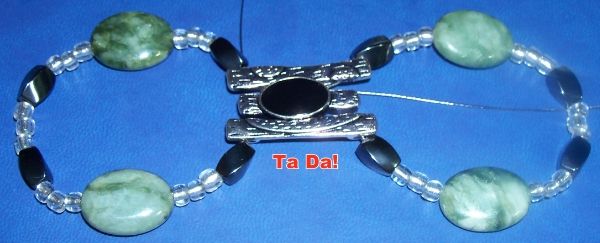
Obviously you wont have free ends on yours but you get the idea ;).
I hope this helps others on your crafty journey :D. Feel free to share but please link back and give proper credit such as "An Original Work Of The Polished Pisces Via http://polishedpisces.blogspot.com/".
Have a great night all!
No comments:
Post a Comment